Homelab Remote Access and Service Deployment using Ngrok and Systemd
This document describes how I set up:
- Remote SSH access to my homelab laptop using Ngrok
- Ngrok custom subdomain endpoints for exposing services
- Permanent backend hosting using systemd
- SSH shortcuts on my client machine
- A reusable pattern for creating new backend services using systemd
- Adding new Ngrok endpoints for any additional backend service
All client-side and server-side commands are clearly separated. If you have any doubts or questions, all the answers are just one prompt away.
1. Installing and Configuring Ngrok on My Server (Remote Laptop)
Server Commands
1.1 Installing Ngrok
I installed Ngrok using snap (You can see ngrok documentation for better instructions):
curl -s https://ngrok-agent.s3.amazonaws.com/ngrok.asc | sudo tee /etc/apt/keyrings/ngrok.asc > /dev/null
echo "deb [signed-by=/etc/apt/keyrings/ngrok.asc] https://ngrok-agent.s3.amazonaws.com buster main" | sudo tee /etc/apt/sources.list.d/ngrok.list
sudo apt update
sudo apt install ngrok
1.2 Authenticating Ngrok
ngrok config add-authtoken <YOUR_NGROK_TOKEN>
1.3 Creating the Ngrok Configuration File
I created the directory and config file:
mkdir -p ~/.config/ngrok
nano ~/.config/ngrok/ngrok.yml
My configuration looked like this for setting up ssh and s3server endpoints:
version: "3"

agent:
  authtoken: YOUR_NGROK_AUTHTOKEN

endpoints:
  - name: ssh
    url: tcp://1.tcp.in.ngrok.io:PORT -> You will get this port from ngrok tcp dashboard
    upstream:
      url: 22

  - name: s3server
    url: https://s3.ancore-homelab.ngrok.dev -> You will have to manually
    add these endpoints/domains in ngrok dashboard
    upstream:
      url: 3000
      protocol: http1
The TCP address for SSH appears in my Ngrok dashboard.
1.4 Starting Ngrok Endpoints
ngrok start --all
2. SSH Into My Server through Ngrok
Ngrok exposes a TCP SSH tunnel such as:
tcp://1.tcp.in.ngrok.io:20518 -> localhost:22
To SSH into my machine, I run:
ssh <YOUR_USERNAME>@1.tcp.in.ngrok.io -p <PORT>
3. Creating an SSH Shortcut on My Client Machine
I edited my client SSH config:
nano ~/.ssh/config
I added:
Host homelab
    HostName 1.tcp.in.ngrok.io
    Port <PORT>
    User <YOUR_USERNAME>
Now I connect using:
ssh homelab
4. Running Backend Applications Permanently using systemd
Systemd ensures my backend services keep running even if:
- I close SSH
- My laptop lid closes
- My internet resets
I documented how I created the service s3.homelab.service, and how I can create similar ones for any new backend.
5. Complete Documentation: How I Configured s3.homelab.service
5.1 Building My Go-based S3 Server
I navigated to my project directory:
cd /home/<YOUR_USERNAME>/Documents/universe/homelab-s3/backend -> your own directory
Then I built the binary:
go build -o s3homelab cmd/server/main.go
This generated:
/home/<YOUR_USERNAME>/Documents/universe/homelab-s3/backend/s3homelab
5.2 Creating the Systemd Service File
I created the service:
sudo tee /etc/systemd/system/s3.homelab.service > /dev/null <<'EOF'
[Unit]
Description=s3-homelab (port 3000)
After=network.target

[Service]
Type=simple
User=<YOUR_USERNAME>
WorkingDirectory=/home/<YOUR_USERNAME>/Documents/universe/homelab-s3/backend
ExecStart=/home/<YOUR_USERNAME>/Documents/universe/homelab-s3/backend/s3homelab
Restart=always
RestartSec=5
Environment=PORT=3000

[Install]
WantedBy=multi-user.target
EOF
Why sudo systemctl daemon-reload is needed? Systemd keeps a cached list of all service files
Systemd does not automatically re-read: new service files in /etc/systemd/system/ modified service files deleted service files
It loads them once during boot and then keeps them in memory.
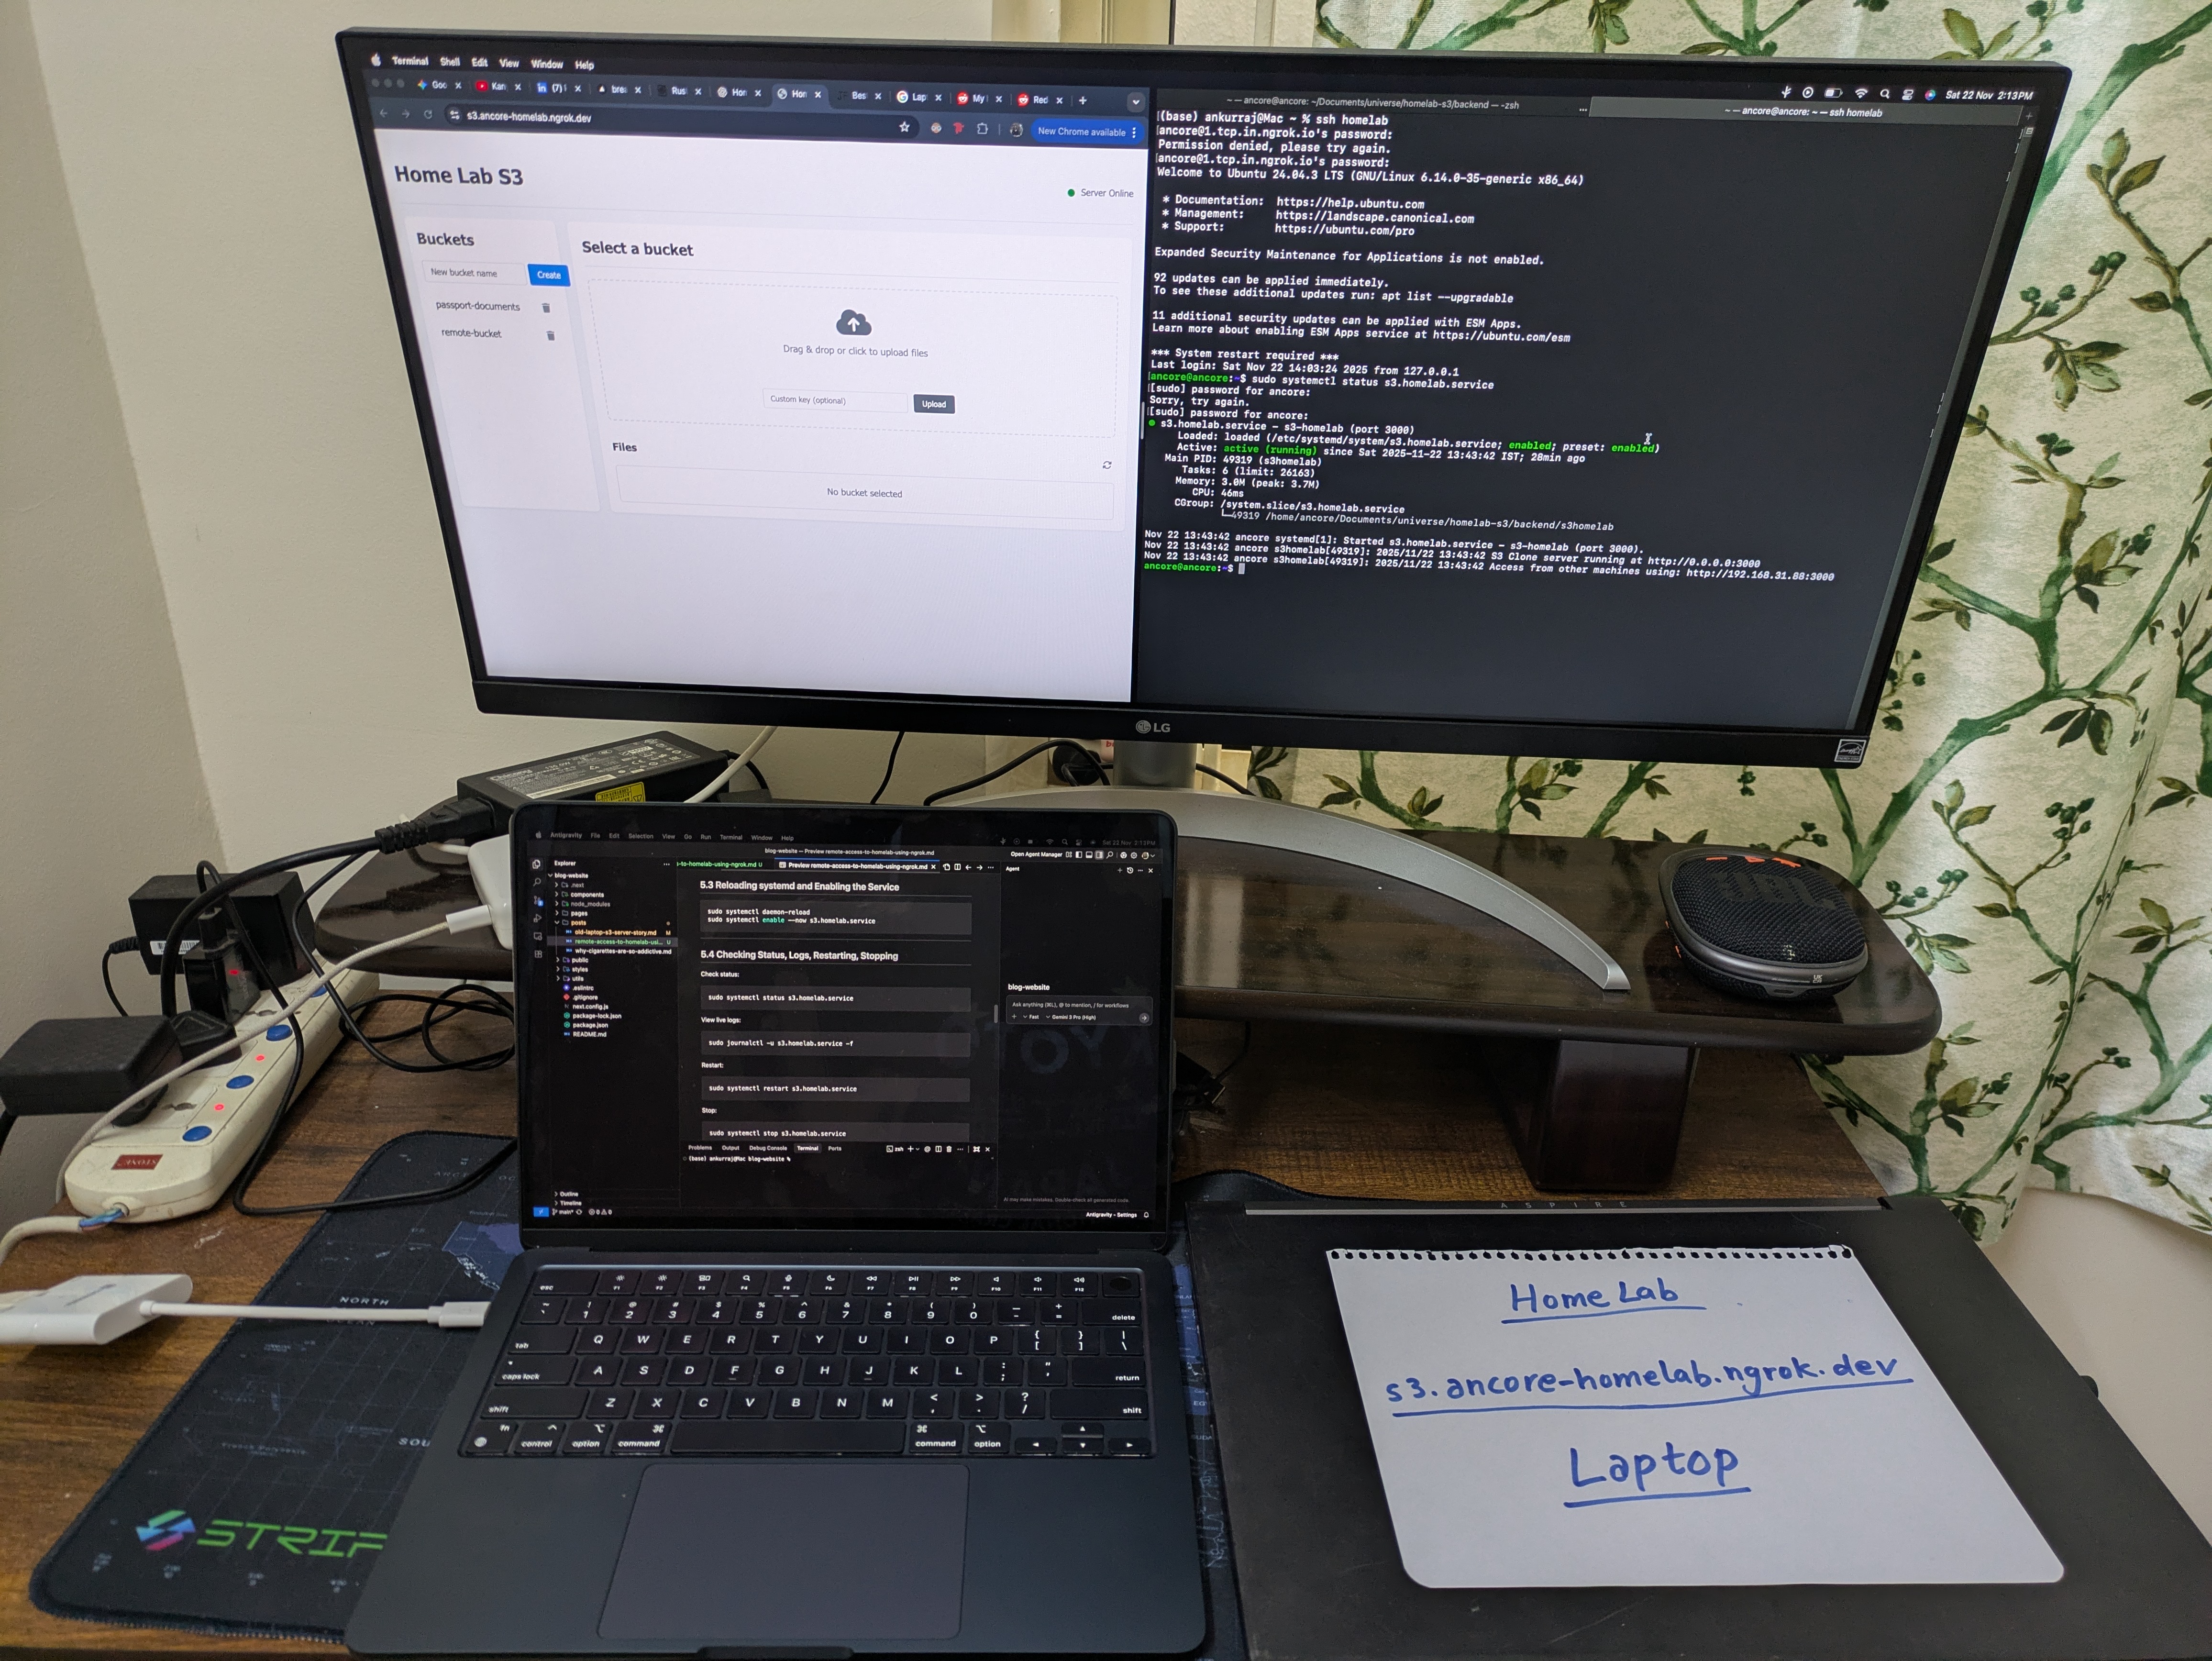
5.3 Reloading systemd and Enabling the Service
sudo systemctl daemon-reload
sudo systemctl enable --now s3.homelab.service
5.4 Checking Status, Logs, Restarting, Stopping
Check status:
sudo systemctl status s3.homelab.service
View live logs:
sudo journalctl -u s3.homelab.service -f
Restart:
sudo systemctl restart s3.homelab.service
Stop:
sudo systemctl stop s3.homelab.service
Disable autostart:
sudo systemctl disable s3.homelab.service
Enable autostart:
sudo systemctl enable s3.homelab.service
6. Creating or Adding Any New Backend Service using systemd
This is the template I follow for any new backend service.
Step 1: Build or Create the Executable
Go example:
git clone <YOUR_GITHUB_REPO_URL>
cd <YOUR_PROJECT_DIR>
go build -o mynewservice cmd/api/main.go
go build -o mynewservice cmd/api/main.go
Node example:
which node
Typical output:
/usr/bin/node
Step 2: Create Systemd Service
sudo tee /etc/systemd/system/mynewservice.service > /dev/null <<'EOF'
[Unit]
Description=My New Service (port 5000)
After=network.target

[Service]
Type=simple
User=<YOUR_USERNAME>
WorkingDirectory=/path/to/project
ExecStart=/path/to/project/mynewservice
Restart=always
RestartSec=5
Environment=PORT=5000

[Install]
WantedBy=multi-user.target
EOF
Step 3: Enable and Start the Service
sudo systemctl daemon-reload
sudo systemctl enable --now mynewservice.service
Step 4: Logs
sudo journalctl -u mynewservice.service -f
7. Adding New Ngrok Endpoints for Additional Services
If I deploy a new backend on port 5000 and want:
https://api.ancore-homelab.ngrok.dev
Step 1: Update Ngrok Config
nano ~/.config/ngrok/ngrok.yml
I add:
  - name: api
    url: https://api.ancore-homelab.ngrok.dev
    upstream:
      url: 5000
      protocol: http1
Step 2: Restart Ngrok
pkill ngrok
ngrok start --all
Now the service is online at:
https://api.ancore-homelab.ngrok.dev
8. Running Ngrok Itself as a systemd Service (Optional)
I can run Ngrok at system startup using systemd.
sudo tee /etc/systemd/system/ngrok.service > /dev/null <<'EOF'
[Unit]
Description=Ngrok Tunnel Service
After=network-online.target
Wants=network-online.target

[Service]
ExecStart=/usr/bin/ngrok start --all --config /home/<YOUR_USERNAME>/.config/ngrok/ngrok.yml
Restart=on-failure
User=<YOUR_USERNAME>

[Install]
WantedBy=multi-user.target
EOF
Then I enable it:
sudo systemctl daemon-reload
sudo systemctl enable --now ngrok.service
Next Steps
- How can I enable multiple use ssh securely ?