How I Turned My Old Laptop into a Local S3 Server Using Go and Ubuntu
A few weeks ago, I was cleaning my desk and noticed my old Windows laptop sitting there, untouched for months.
It wasn’t broken, just slow, outdated, and forgotten. But I couldn’t bring myself to throw it away.
I decided to convert it into a home server — a small, self-hosted cloud to store and sync files across all my devices.
Building My Own S3 Clone
The first part of the experiment was to build the backend. I didn’t want to use any heavy tools. Instead, I wanted to write something simple of my own.
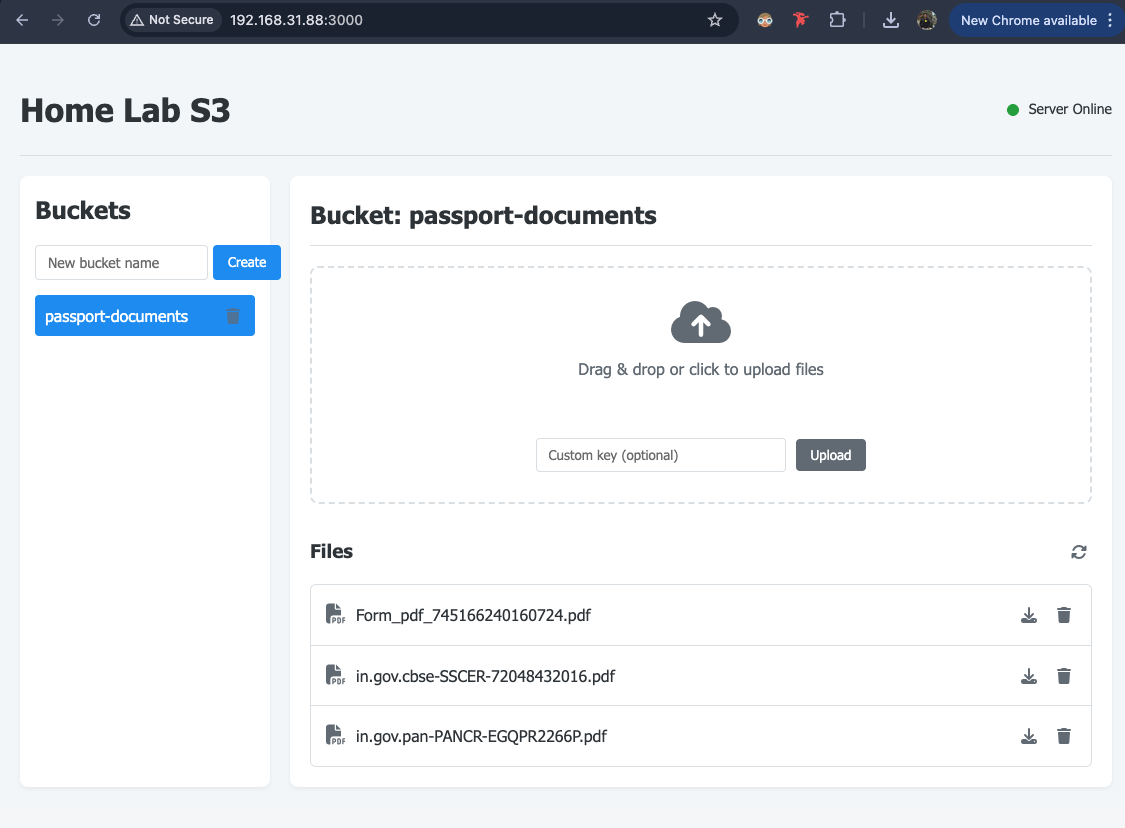
Within a day, I had a small server running that mimicked the essential functionality of Amazon S3 — listing buckets, uploading files, and downloading them.
Here’s what it could do:
- Create, list, and delete buckets
- Upload and download files
- Handle
GET,PUT,LIST, andDELETErequests - Serve a clean, drag-and-drop web interface for managing files
The repository lived on GitHub. I wanted others (and my future self) to be able to clone it easily.
After pushing it, I decided to take things further, to actually host it on my old laptop.
Breathing Life into the Old Laptop
My laptop was still running Windows, and while it would’ve worked fine, I wanted something cleaner something built for servers.
So I decided to switch it to Ubuntu.
You can skip this step, also you can get so many better blogs to install ubuntu in your old laptop.
Setting Up the Server
Once Ubuntu booted for the first time, I installed Go, cloned my project, and ran the server:
git clone https://github.com/ancoreraj/homelab-s3.git
cd homelab-s3/backend
go mod download
go run cmd/server/main.go
Server started on port 3000
I opened the browser on my laptop and navigated to http://localhost:3000.
There it was, the web interface I had built just the night before.
It had a sidebar for buckets, a main section for files, and drag-and-drop upload support.
Making It Accessible Across My Network
Now came the fun part, making it accessible from my other devices.
All my devices (my MacBook, phone, and tablet) were on the same Wi-Fi network, so I just needed my Ubuntu machine’s IP.
Use below command to find your IP address
ipconfig getifaddr en0
Something like this will be your ip address
inet 192.168.1.**/**
That was my laptop’s IP address.
I opened the browser on my MacBook and entered:
http://192.168.1.**:3000
It loaded instantly.
The same web UI, same data, but this time served from a different device.
I uploaded a few files, created some buckets, and watched it all sync perfectly across devices.
It felt surprisingly empowering — having my own little cloud, hosted entirely on my home network.
Keeping the Server Running with Lid Closed
Of course, I didn’t want to keep my laptop open all the time just to keep the server running.
By default, Ubuntu suspends when you close the lid, which would kill the server.
So I tweaked that setting.
In the terminal, I opened the logind.conf file:
sudo nano /etc/systemd/logind.conf
And changed one line:
HandleLidSwitch=ignore
After restarting the service:
sudo systemctl restart systemd-logind
Now my laptop could run with the lid closed — quietly tucked away on a shelf, consuming little power, but always available.
SSH Access from My MacBook
Next, I wanted remote terminal access.
So I installed and enabled the SSH server on Ubuntu:
sudo apt update
sudo apt install openssh-server
sudo systemctl start ssh
sudo systemctl status ssh
I checked its status to be sure:
Active: active (running)a
Then, from my MacBook, I connected:
ssh username@ip_address
It prompted me for the password, and just like that, I was inside my Ubuntu machine remotely. Now I could start, stop, or update the Go server without ever touching the laptop physically and sync all of data with my laptop.
Hope you like this blog post. Lets connect at Twitter or LinkedIn.